
 EN
EN


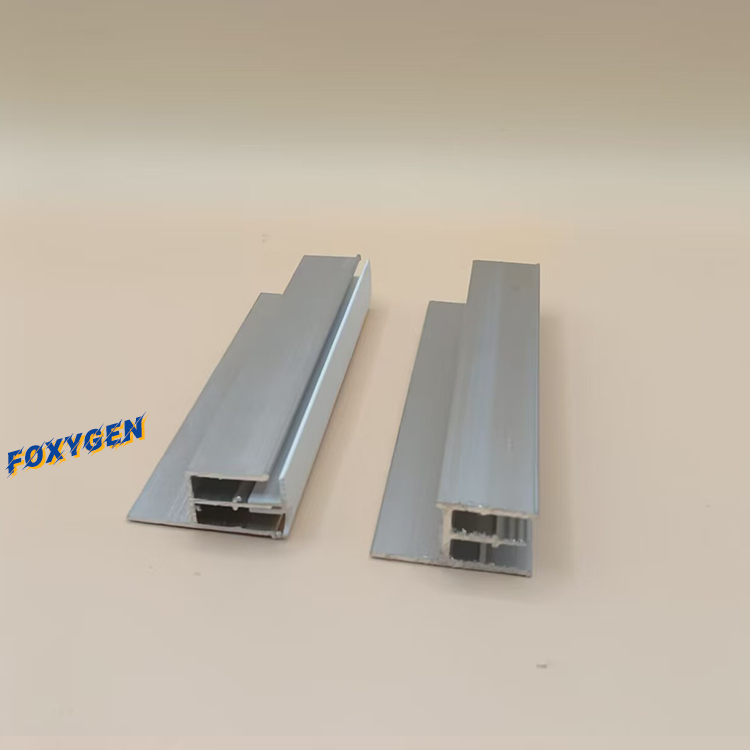
Installieren lineare Aluminiumprofile für LED-Streifen ist eine praktische Fertigkeit, die das Erscheinungsbild und die Funktionalität moderner Räume verändert. Ob Sie die Beleuchtung in Wohnräumen verbessern, gewerbliche Umgebungen gestalten oder architektonische Akzente setzen – lineare Aluminiumprofile für LED-Streifen sorgen für ein professionelles, sauberes Erscheinungsbild und schützen zugleich Ihre LED-Komponenten. Diese Anleitung führt Sie durch jeden Schritt des Montageprozesses und stellt sicher, dass Ihre linearen Aluminiumprofile für LED-Streifen ab dem ersten Tag korrekt montiert, ausgerichtet und funktionsfähig sind.
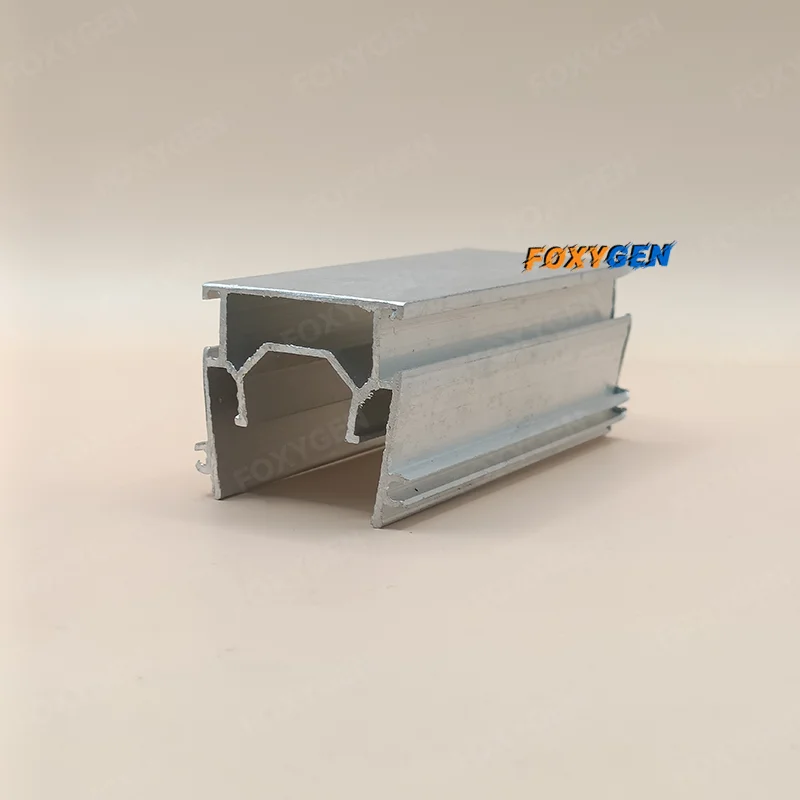
Die Montage linearer Aluminiumprofile für LED-Streifen erfordert sorgfältige Planung, genaue Messung und besondere Sorgfalt. Diese Aluminium-Strangpressprofile erfüllen mehrere Funktionen: Sie leiten Wärme von Ihren LEDs ab, schützen die Streifen vor mechanischer Beschädigung und verleihen Ihrem Lichtdesign ein fertiges, integriertes Erscheinungsbild. Die Kenntnis der richtigen Reihenfolge für die Montage linearer Aluminiumprofile für LED-Streifen hilft Ihnen, häufige Fehler zu vermeiden und langfristig dauerhafte Ergebnisse zu erzielen.
Vorbereitung und Planung für die Montage linearer Aluminiumprofile
Messen und Markieren Ihres Installationsbereichs
Bevor Sie mit der Montage linearer Aluminiumprofile für LED-Streifen beginnen, ist eine präzise Messung unerlässlich. Verwenden Sie ein Maßband, um die exakte Länge zu ermitteln, über die Ihre linearen Aluminiumprofile für LED-Streifen verlaufen sollen. Markieren Sie die Mittellinie oder Kante, an der die linearen Aluminiumprofile für LED-Streifen positioniert werden sollen, mithilfe einer Kreidelinie oder eines Bleistifts. Prüfen Sie auf Hindernisse, elektrische Steckdosen oder bauliche Elemente, die Ihre Installation linearer Aluminiumprofile für LED-Streifen beeinträchtigen könnten. Bei Ecken und komplexen Layouts führen Sie zunächst ein Trockenmontage-Testlauf Ihrer linearen Aluminiumprofile für LED-Streifen durch, um sicherzustellen, dass sie korrekt ausgerichtet sind, ohne Wände oder Armaturen beschädigen zu müssen. Dokumentieren Sie alle Messungen schriftlich, um kostspielige Fehler beim Materialkauf zu vermeiden.
Werkzeuge und Materialien zusammenstellen
Sie benötigen spezielle Werkzeuge, um lineare Aluminiumprofile für LED-Streifen erfolgreich zu installieren. Zu den unverzichtbaren Utensilien gehören ein Bohrer mit passenden Bohrern, eine Kreissäge oder ein Aluminiumschneidwerkzeug, eine Wasserwaage, ein Maßband sowie Befestigungselemente, die auf Ihre Untergrundart abgestimmt sind. Bei der Auswahl der Befestigungselemente für lineare Aluminiumprofile für LED-Streifen müssen Sie diese an Ihre Wandart anpassen: Trockenbauanker für Standard-Trockenbauwände, Schrauben für Holz- oder Metallständer oder Klebesysteme für Beton- und Fliesenoberflächen. Hochwertige klebebeschichtete lineare Aluminiumprofile für LED-Streifen machen Bohrarbeiten überflüssig und eignen sich daher ideal für Mieträume oder empfindliche Oberflächen. Bereiten Sie vor Beginn der Montage Ihre LED-Streifen, ggf. Diffusoren sowie Endkappen vor, die speziell für Ihre linearen Aluminiumprofile für LED-Streifen konzipiert sind.
Schritt-für-Schritt-Anleitung zur Montage linearer Aluminiumprofile
Montage der linearen Aluminiumprofile für LED-Streifen
Beginnen Sie damit, Ihre linearen Aluminiumprofile für LED-Streifen an der markierten Linie an Ihrer Wand zu positionieren. Verwenden Sie eine Wasserwaage, um sicherzustellen, dass die linearen Aluminiumprofile für LED-Streifen je nach Ihrem Gestaltungsplan perfekt horizontal oder vertikal ausgerichtet sind. Falls Bohrarbeiten erforderlich sind, verhindern Vorbohrungen das Reißen des Aluminiums und gewährleisten, dass die Befestigungselemente bündig sitzen. Platzieren Sie die Befestigungselemente im Abstand von 30 bis 40 cm entlang der Länge Ihrer linearen Aluminiumprofile für LED-Streifen, um eine optimale Stabilität zu gewährleisten. Ziehen Sie die Befestigungselemente schrittweise fest, beginnend in der Mitte und arbeitend nach außen, um die linearen Aluminiumprofile für LED-Streifen gerade und ausgerichtet zu halten. Vermeiden Sie ein Überdrehen, das das Aluminium verformen oder Oberflächenschäden verursachen kann.
Schneiden und Ecken anpassen
Wenn Ihr Layout Ecken oder individuelle Längen erfordert, muss das Schneiden linearer Aluminiumprofile für LED-Streifen präzise erfolgen. Messen Sie den erforderlichen Winkel und die benötigte Länge und markieren Sie die Schnittlinie deutlich auf den linearen Aluminiumprofilen für LED-Streifen. Verwenden Sie eine Feinzahnsäge, die speziell für Aluminium ausgelegt ist, um saubere Schnitte an Ihren linearen Aluminiumprofilen für LED-Streifen durchzuführen. Eckverbinder, die speziell für lineare Aluminiumprofile für LED-Streifen konzipiert sind, vereinfachen Übergänge und bewahren ein professionelles Erscheinungsbild. Glätten Sie nach dem Schneiden scharfe Kanten an Ihren linearen Aluminiumprofilen für LED-Streifen mit einer Feile oder einem Entgratwerkzeug. Führen Sie vor der endgültigen Befestigung der linearen Aluminiumprofile für LED-Streifen an Ihrer Montagefläche einen Probemontageversuch für jedes Einzelteil durch.
Installation von LED-Streifen und Abschluss Ihrer Installation
Einlegen von LED-Streifen in lineare Aluminiumprofile
Sobald Ihre linearen Aluminiumprofile für LED-Streifen sicher montiert sind, bereiten Sie Ihren LED-Streifen für den Einbau vor. Reinigen Sie die innere Oberfläche der linearen Aluminiumprofile für LED-Streifen mit einem weichen Tuch, um Staub und Schmutz zu entfernen. Ziehen Sie die Klebeschicht Ihres LED-Streifens ab und drücken Sie ihn vorsichtig in den unteren Kanal der linearen Aluminiumprofile für LED-Streifen. Beginnen Sie an einem Ende und arbeiten Sie sich schrittweise zum anderen Ende vor, um eine gleichmäßige Kontaktfläche entlang der gesamten Länge sicherzustellen. Dehnen oder forcieren Sie Ihren LED-Streifen nicht in die linearen Aluminiumprofile für LED-Streifen, da dies die lichtemittierenden Komponenten beschädigen kann. Drücken Sie sanft, aber fest, um eine maximale Haftung innerhalb Ihrer linearen Aluminiumprofile für LED-Streifen zu erreichen.
Diffusoren und Endkappen anbringen
Diffusoren verbessern die Lichtverteilung und verhindern Blendung, wenn sie über Ihren linearen Aluminiumprofilen für LED-Streifen montiert werden. Wählen Sie das Diffusormaterial entsprechend den Spezifikationen Ihrer linearen Aluminiumprofile für LED-Streifen aus – verfügbar in satiniert, klar oder getönt. Schieben Sie den Diffusor in die Nuten auf der Oberseite der linearen Aluminiumprofile für LED-Streifen, beginnend an einem Ende und bis zum anderen Ende. Endkappen verschließen die linearen Aluminiumprofile für LED-Streifen und verleihen Ihrer Installation ein poliertes, vollständiges Erscheinungsbild. Befestigen Sie die Endkappen, indem Sie sie auf die Profilenden schieben oder die mitgelieferte Klebeunterseite verwenden (im Lieferumfang der Zubehörartikel für lineare Aluminiumprofile für LED-Streifen enthalten). Testen Sie vor dem endgültigen Festziehen alle Verbindungen des LED-Streifens, um eine ordnungsgemäße Stromversorgung sicherzustellen.
Best Practices für eine langfristige Leistung
Elektrische Anschlüsse und Sicherheit
Verlegen Sie die Stromkabel entlang oder hinter Ihren linearen Aluminiumprofilen für LED-Streifen, um ein sauberes Erscheinungsbild zu bewahren und die Kabel zu schützen. Verwenden Sie Kabelclips oder -kanäle, um die Kabel an Ihren linearen Aluminiumprofilen für LED-Streifen oder an der Montagefläche zu befestigen. Vermeiden Sie es, Stromanschlüsse an Stellen anzubringen, an denen sich Feuchtigkeit oder Staub um Ihre linearen Aluminiumprofile für LED-Streifen ansammeln könnten. Wenn Sie mit 12-V- oder 24-V-Systemen arbeiten, lineare Aluminiumprofile für LED-Streifen muss bei Bedarf durch Ihre Systemvorgaben eine ordnungsgemäße Erdung vorgesehen werden. Prüfen Sie alle Verbindungen gründlich, bevor Sie die Installation Ihrer linearen Aluminiumprofile für LED-Streifen als abgeschlossen betrachten. Überprüfen Sie die Polarität der Anschlüsse nochmals, um Schäden an Ihren LED-Komponenten oder an der Stromversorgung zu vermeiden.
Wartung und Langlebigkeit
Regelmäßige Wartung hält Ihre linearen Aluminiumprofile für LED-Streifen jahrelang optisch ansprechend und funktionsfähig. Staub, der sich auf oder in Ihren linearen Aluminiumprofilen für LED-Streifen ansammelt, verringert die Lichtausbeute und kann Wärme festhalten. Reinigen Sie die Außenseite Ihrer linearen Aluminiumprofile für LED-Streifen vierteljährlich mit einem weichen, trockenen Tuch. Befinden sich Ihre linearen Aluminiumprofile für LED-Streifen in feuchten Bereichen wie Badezimmern oder Küchen, prüfen Sie sie regelmäßig auf Wasseransammlungen oder Anzeichen von Korrosion. Hochwertiges Aluminium ist von Natur aus korrosionsbeständig, doch regelmäßige Inspektionen Ihrer linearen Aluminiumprofile für LED-Streifen gewährleisten eine lange Lebensdauer. Ersetzen Sie Streifendiffusoren, sobald sie vergilben oder beschädigt werden, um Optik und Funktionalität Ihrer linearen Aluminiumprofile für LED-Streifen zu bewahren.
Häufig gestellte Fragen
Wie schneidet man lineare Aluminiumprofile für LED-Streifen am besten, ohne sie zu beschädigen?
Verwenden Sie eine Feinsäge oder ein Aluminiumschneidwerkzeug, das speziell für präzises Metallbearbeiten konzipiert ist. Markieren Sie Ihre Schnittlinie deutlich auf den linearen Aluminiumprofilen für LED-Streifen, bevor Sie schneiden. Stützen Sie das Aluminiumprofil fest ab, um Vibrationen während des Schneidens zu vermeiden. Nach dem Schneiden Ihrer linearen Aluminiumprofile für LED-Streifen entgraten Sie die Kanten mit einer Feile oder Schleifpapier, um ein glattes Finish zu erzielen und Verletzungen zu vermeiden. Vermeiden Sie Hochgeschwindigkeits-Handwerkzeuge, die die linearen Aluminiumprofile für LED-Streifen überhitzen und verziehen können.
Können lineare Aluminiumprofile für LED-Streifen im Außenbereich installiert werden?
Ja, Aluminium widersteht Korrosion natürlicherweise besser als viele andere Materialien, doch die Montage linearer Aluminiumprofile für LED-Streifen im Außenbereich erfordert besondere Überlegungen. Wählen Sie versiegelte, eloxierte oder pulverbeschichtete lineare Aluminiumprofile für LED-Streifen, die speziell für den Außeneinsatz konzipiert sind. Stellen Sie sicher, dass alle Befestigungselemente und Endkappen aus rostfreiem Stahl oder verzinktem Stahl bestehen, um Rostbildung zu vermeiden, die Ihre linearen Aluminiumprofile für LED-Streifen beeinträchtigen könnte. Eine ordnungsgemäße Wasserabfuhr ist entscheidend für lineare Aluminiumprofile für LED-Streifen im Außenbereich; vermeiden Sie daher Standorte, an denen sich Wasser stauen kann. Bringen Sie wetterbeständige Silikondichtungen um sämtliche Öffnungen in Ihren linearen Aluminiumprofilen für LED-Streifen an, um Feuchtigkeitseintritt zu verhindern.
Wie berechne ich, wie viele lineare Aluminiumprofile für LED-Streifen ich für meinen Raum benötige?
Messen Sie die gesamte lineare Strecke, auf der Sie lineare Aluminiumprofile für LED-Streifen installieren möchten, einschließlich aller geraden Abschnitte und Ecken. Berücksichtigen Sie bei der Berechnung der Gesamtlänge Ihrer linearen Aluminiumprofile für LED-Streifen Eckverbinder und Übergänge. Fügen Sie 5 bis 10 Prozent zusätzliches Material hinzu, um Schnittfehler oder zukünftige Anpassungen Ihres Layouts mit linearen Aluminiumprofilen für LED-Streifen auszugleichen. Erwägen Sie, etwas mehr als berechnet zu bestellen, um Ersatzteile verfügbar zu haben, falls Ihre linearen Aluminiumprofile für LED-Streifen ersetzt werden müssen. Erkundigen Sie sich bei Ihrem Lieferanten nach den verfügbaren Längen für Standard-lineare Aluminiumprofile für LED-Streifen, um Schneidabfälle zu minimieren.