
 EN




A successful stretch ceiling installation depends on accurate room preparation, a secure perimeter profile, controlled membrane handling, and a careful final inspection. This guide follows the job in sequence so installers can plan the work, avoid common fitment problems, and understand where precision matters most during stretch ceiling installation.
The exact procedure varies with the membrane, profile, room geometry, and manufacturer’s instructions. Treat stretch ceiling installation as a coordinated system rather than a sequence of isolated tasks: check the substrate, confirm the layout, fit compatible components, and tension the material evenly. Always follow the product-specific guidance and applicable site safety requirements.
Prepare the room and plan the installation
Survey dimensions, services, and substrate
Begin stretch ceiling installation with a room survey, not with cutting or heating. Measure each wall at several points, note corners and changes of direction, and record ceiling levels, beams, recesses, and other obstructions. A measured sketch helps installers calculate the membrane and profile requirements while revealing irregularities that could affect the finished plane.
Identify electrical fittings, ventilation, sprinklers, and any equipment that must remain accessible. Confirm where each service will pass through the new ceiling and what support it needs above the membrane. During stretch ceiling installation, fixtures should not rely on the flexible surface for structural support; use suitable backing or platforms fixed to the building structure.
Inspect the wall or ceiling edge where the perimeter profile will attach. The fixing surface must be sound enough to hold the selected fasteners, and loose finishes or weak plaster may need attention first. Include this check in stretch ceiling installation planning, because a profile cannot remain secure if its base is unstable or unsuitable.
Set out the work and protect the space
Establish the finished ceiling height in relation to doors, windows, cabinets, and service connections. Use a level or laser to transfer a consistent datum around the room, then verify it at corners and transitions. Good stretch ceiling installation set-out prevents a visually uneven perimeter and gives the fitting crew a reliable reference for the profile.
Clear the work area, protect floors and furnishings, and make sure ladders or access equipment can be positioned safely. Check that the membrane, profile, joining components, and tools are present and compatible before work begins. Organized stretch ceiling installation reduces unnecessary handling and helps avoid interruptions once the material is being positioned.
Agree on roles if more than one installer is involved. One person can manage alignment while another supports and feeds the membrane, with communication maintained around corners and fixtures. This coordination is particularly useful in stretch ceiling installation because uneven pulling or rushed movement can create folds that are harder to correct later.
Fit the perimeter profile and position the membrane
Install and verify the perimeter profile
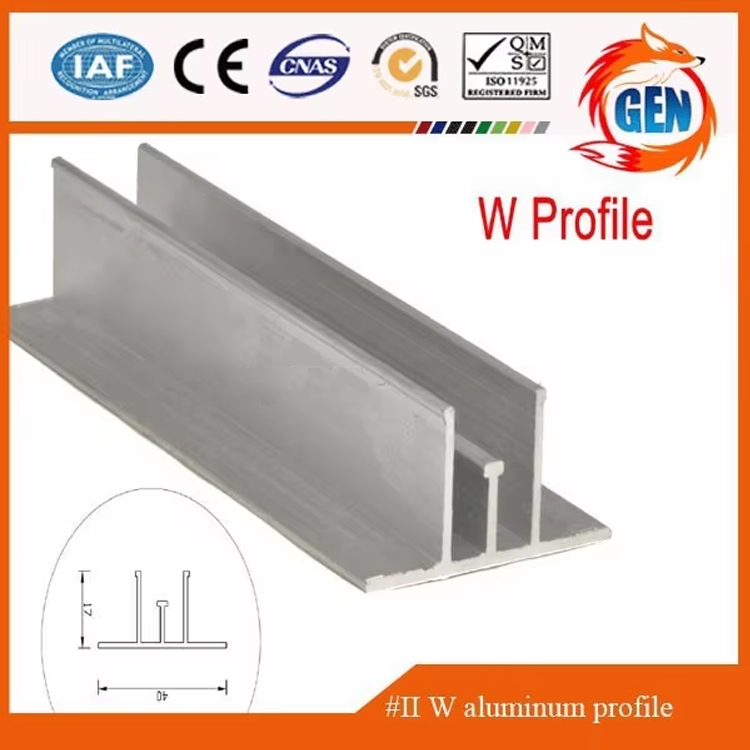
Cut and join profile sections according to the system instructions, taking care at internal and external corners. Position each length on the marked datum and select fixings appropriate to the substrate. In stretch ceiling installation, consistent alignment matters: a small step or gap in the profile can become visible at the finished edge or interfere with membrane engagement.
Fix the profile at the spacing and locations specified for the chosen system, adding suitable support where the instructions require it. Check each section for level, secure attachment, and clean joins as you proceed. Before moving on, inspect the full perimeter; correcting an alignment issue now is generally simpler than troubleshooting it during stretch ceiling installation tensioning.
Prepare openings and support platforms for planned fittings before the membrane is stretched. Confirm their positions against the room layout and ensure they are independently secured at the intended finished height. This stretch ceiling installation detail helps the ceiling sit neatly around fittings without asking the membrane to carry fixture loads.
Unpack, orient, and engage the membrane
Handle the membrane with clean hands and a clear work surface, following the manufacturer’s instructions for storage, orientation, and temperature. Avoid dragging it over rough edges or placing tools on it. Stretch ceiling installation relies on an undamaged, correctly oriented sheet, so identify the appropriate edges or corners before lifting it into position.
Attach the membrane progressively at the specified starting points, using the recommended fitting tool and method. Keep the material supported and distribute handling between installers rather than pulling sharply at a single point. For stretch ceiling installation, steady engagement around the perimeter gives the crew more control over alignment and helps prevent localized strain.
Work from the initial attachment points toward the remaining edges in a deliberate sequence. Pause to check that the membrane is feeding evenly and that corners are not twisted or trapped. If a fold or resistance appears, stop and identify the cause instead of forcing the material; patient stretch ceiling installation protects both the membrane and the profile connection.
Tension, detail, and inspect the finished ceiling
Apply controlled heat and even tension
Where the selected membrane system requires heat, use the specified equipment, temperature guidance, ventilation, and safe working practices. Keep heat distribution controlled and appropriate to the material; avoid concentrating it on one area. Stretch ceiling installation procedures differ by product, so do not substitute assumptions or generic settings for the manufacturer’s instructions.
As the membrane becomes workable, continue engaging it around the perimeter using an even, planned sequence. Watch for consistent tension, smooth corners, and any signs of uneven stretching. During stretch ceiling installation, small adjustments made progressively are easier to manage than trying to correct a large area after the entire edge is fixed.
If the system uses a dedicated fitting kit, confirm that each component is intended for the selected profile and membrane. A stretch ceiling installation system can help keep the required fitting components together, but installers should still verify compatibility and follow the product directions for each item.
Finish openings and complete quality checks
Once the membrane is seated, complete fixture openings only as directed by the system supplier. Fit any specified reinforcement rings or support components before making a cut, and check alignment with the prepared platforms. This stretch ceiling installation step needs care because an opening in the wrong place or without required reinforcement may compromise the finish.
Inspect the ceiling from multiple positions under the room’s normal lighting. Look for uneven edges, visible gaps, trapped folds, marks, or movement around fittings, and address concerns using approved methods. A stretch ceiling installation is not complete simply because the membrane is attached; the visible surface and perimeter details should be checked systematically.
Finally, remove protective materials, clean the work area, and confirm that fixtures and services operate as intended. Document any product-specific care instructions for the site team and leave access points clear. Careful stretch ceiling installation combines a secure fit with a clean handover, giving building operators a ceiling that is ready for normal use.
FAQ
Can one installer complete a stretch ceiling installation?
The answer depends on room size, membrane handling requirements, access, and the system instructions. Some smaller jobs may be manageable by one trained installer, while larger or more complex stretch ceiling installation work benefits from coordinated assistance. Follow the product guidance and do not compromise safe handling to reduce crew size.
Should lighting be installed before the membrane?
Support platforms and service preparation generally need to be completed before the membrane is fitted, while final fixture installation may happen afterward according to the system method. Plan these stages during stretch ceiling installation so each fitting aligns with its support and any required reinforcement is fitted before cutting.
What should installers do if folds remain visible?
Pause and check membrane orientation, profile engagement, room conditions, and the product’s tensioning method. Do not apply uncontrolled heat or force as a quick fix. If a fold persists during stretch ceiling installation, consult the manufacturer’s instructions or technical support before attempting a correction that could damage the material.